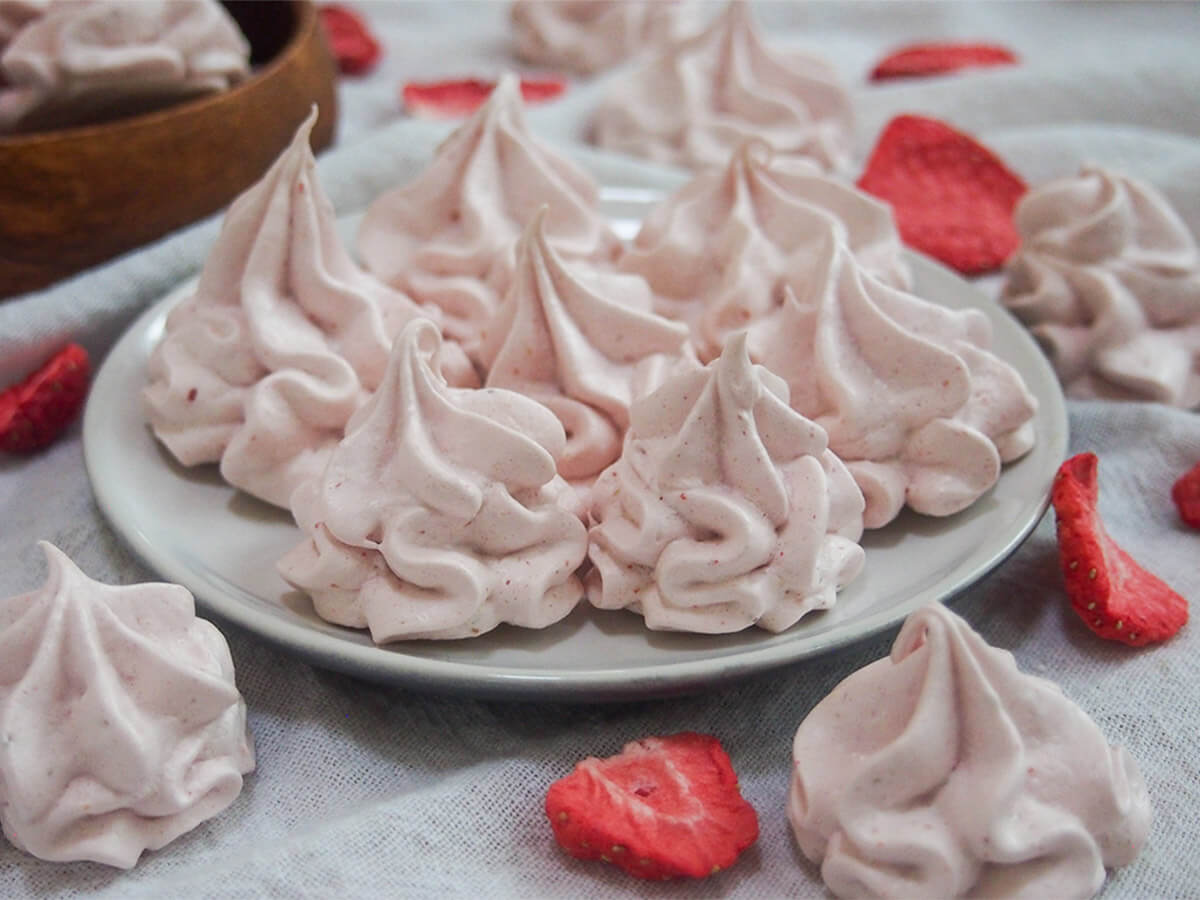
These strawberry meringue cookies are easy to make, with a wonderful delicate color, crunch and flavor. They make a great treat, edible gift or whatever excuse you want to find.

This post may contain affiliate links, where we earn from qualifying purchases. See more details in the policy page.
Meringues were one of those things my mum would turn to as a way to use up leftover egg whites when I was a child. Or if she had more, she made pavlova. I definitely didn't complain about either as a tasty treat, though somehow I didn't pick up the habit of making them relatively often myself.
My mum's meringues tended to be the chewy version, which I do love, but the smaller, drier meringue cookies are also a tasty treat, and are particularly good to give as a gift.

While they might look a little fancy, they are surprisingly easy to make, with only a short list of ingredients. You just need to keep a couple tips in mind as you make and cook them.
Different types of meringue
Meringue is essentially just egg white and sugar, with air incorporated to give the wonderful texture. After that, you might add some small amounts of other ingredients to add flavor or help with the structure. However there are also a few different types of meringue that use different techniques.

Swiss meringue involves warming your base mixture then whipping it. It gives a silky texture, and is pretty stable, but it can be more dense since the sugar is added early on.
Italian meringue involves adding hot sugar syrup to the base egg mixture. This is the most stable kind of meringue, and also silky smooth but with more volume than Swiss. However, the technique can be a bit tricky.
The easiest style is French meringue, which simply involves whipping the egg white and very gradually adding the sugar. Many add a little cream of tartar to the egg whites to help the air hold, though it's not essential.
While French meringue may be a little less stable than the others, for cookies like these, it's a great fit. It's easy, and you get a nice light and airy texture that just melts in your mouth.

Adding flavor
You'll find a few different ways to add flavor to meringues. Some use flavored gelatin, others jam or an extract. This version uses freeze dried strawberry to add flavor and color. By using freeze dried fruit, you aren't adding any extra moisture, which can only be a good thing since moisture is kind of meringue's enemy. I also like that it's a natural flavor, too.
While I really like the flavor and color of strawberry, you can experiment with other freeze dried fruits as well for different flavors. If the color isn't quite what you are looking for, you can add some food coloring, but use just a very small amount if you do. Dot some in with a toothpick.
You will need to crush the dried fruit before you add them so that the pieces are small and mix in easily. You can do this either with a grinder or pestle and mortar, but I find it is probably easiest to pulse them with the sugar in a food processor. This way, you both grind up the dried strawberries, and mix them with the sugar at the same time.

You may find that some pieces of fruit don't break up completely, depending on your food processor. If that's the case, just shake the sugar mixture slightly and the lumps will rise to the top (as the dried fruit is lighter). Then you can either press them against the side of the food processor bowl, or scoop them out and crush separately.
Having the strawberry mixed into the sugar then makes it easier to see when the sugar is mixed into the egg white as you'll see the color mixes through. So as well as adding flavor and color, it makes them easier to make as a bonus!
Top tip: take your time
These are not really difficult, but my main piece of advice is to not rush things - going too fast both in mixing and baking is probably the most likely way they won't work out quite as you hope. See below for some more specific tips.

Tips for making meringue cookies
As I say, these are easier than some other styles of meringue, but it's good to keep a couple things in mind to help them turn out their best.
- If at all possible, bake in lower humidity. I know this may not always be possible, but the drier your conditions, the better. So try not to bake them on a rainy day, for example.
- Don't let anything contaminate your egg whites. Make sure the bowl is really clean, and make sure you don't accidentally get any egg yolk in there. It's worth breaking the eggs one at a time, in a separate bowl, just to be sure you don't accidentally add any yolk. And avoid a plastic bowl, as they can hold traces of fatty residue.
- Start beating the egg whites low, then increase the speed - this helps to get a good texture. Beat until gently stiff - giving a soft peak - before adding the sugar.
- Add the sugar very gradually - just a teaspoon, barely more, at a time. This helps to ensure it dissolves and becomes incorporated properly. Also, if you are in a location where regular sugar can be more coarse (like the UK), use caster sugar instead as it is finer. This helps it mix in more easily, but it should still get there either way. You want a lovely glossy, relatively stiff mixture, as above.
- Pipe or spoon the mixture onto a parchment-lined baking sheet. Piping the mixture helps to give a fancier shape, but a spoon can also work. Using parchment helps to be a drier texture, and also means you can peel any off that may get stuck (though hopefully they will be dry enough). An extra tip - dot some mixture under the corners of the parchment to help keep it in place.
- Bake on low heat, then continue to dry in the oven after it is turned off - these combined help to dry them fully, without browning, and become crisp. The gradual cooling also helps prevent cracking.
Hopefully with these points in mind, you will have some lovely crisp little bites soon.

Storage tips
As mentioned, moisture is the one thing not great for meringues, so you want to make sure you store them in an airtight container. They will keep up to two weeks, though, at room temperature like this (if you let them!)
Being gluten and dairy free, they are great to have as an alternative to other cookies and desserts when that might be an issue. With their pink color, they are ideal whenever that might fit your theme, too. You could also use them to decorate other desserts, place on a dessert board, with coffee or whatever excuse you might want to use.
These strawberry meringue cookies are light, crisp and with a lovely gently flavor. They're all too easy to enjoy one, or more (as my kids would agree!) Give them a try, and you'll no doubt agree!

Try these other easy treats:
- Pignoli cookies (Italian almond cookies, studded with pine nuts - also gluten and dairy free)
- Lemon slice (an easy no-bake treat from Australia, using bought cookies, coconut and lemon)
- Basler brunsli (Swiss chocolate almond cookies, mixed up in the food processor - also gluten and dairy free)
- Plus get more snack recipes, both sweet and savory, in the archives.
Strawberry meringue cookies
Ingredients
- 2 egg whites
- ½ cup sugar (fine, if available)
- ½ oz freeze dried strawberries
- ½ teaspoon vanilla extract
- ⅛ teaspoon cream of tartar (optional)
Instructions
- Preheat the oven to 210F/100C. Line a large baking sheet/tray with parchment.
- Separate the egg whites from the yolks one at a time before adding to a clean bowl, making sure there is no yolk, shell or anything else in the bowl.
- Place the sugar and the freeze dried strawberries in a food processor and mix until the strawberries are well broken up. If a few pieces don't break up, gently shake the food processor bowl so they rise to the top. Then, either press against the side with a spoon to crush or remove and crush separately. Alternatively, you can use a grinder or pestle and mortar to crush the dried strawberries then mix in with the sugar.
- Add the vanilla and cream of tartar, if using, to the egg whites. Using a hand mixer or stand mixer, start by beating the egg whites on a low speed then gradually increase to high speed. Continue to mix until the egg whites form soft peaks (ie they are gently stiff).
- Now, start to add the strawberry-sugar mixture a teaspoonful at a time. After each addition, mix in the sugar so that it is incorporated, then add the next spoonful. Continue slowly and gradually adding the sugar. The mixture will become firmer and glossier as you do so. You shouldn't be able to see any sugar crystals in there.
- Once all the sugar and strawberry mixture is incorporated, transfer the mixture to a piping bag fitted with a large star tip. I find it easiest to place the piping bag in a pint glass, tip down and slightly folded over inside, then fold the top of the bag over the glass. Once filled up, lift up the sides and twist the end to help the mixture press down into the tip.
- Dot a little of the meringue mixture under the corners of the parchment paper to help it stick to the baking sheet/tray and hold in place. Then pipe little mounds in rows on the parchment, leaving a little space between each. They don't expand as they bake, but it helps you avoid hitting others as you remove them. When piping, keep the piping bag fairly close to the parchment and just lift a little as you go to help give a pointed tip.
- Once you have made all of your mounds, transfer to the oven and bake for around 1 hour until the cookies are dry and release from the parchment easily. It's worth checking towards the end of they are close and you can always turn off sooner or give extra time as needed. Then, turn off the oven and leave them to cool gradually in the oven as the oven cols down. Try not to open the oven often so they get the heat as long as possible. You can leave them longer if you like, or else transfer to room temperature to cool completely.
- Store at room temperature in a sealed, airtight container.
Video
Nutrition
Remember to pin for later!


Casey
OOH so tasty and beautiful too! I will definitely be making these again and again.
Caroline's Cooking
Thanks, and glad you enjoyed! I love how they look, too.
Kim
These are so gorgeous! I can't wait to make them for my husband. I just hope mine come out as pretty as yours!
Caroline's Cooking
Thank you - they are easier than they might seem at first, and delicious either way!
Ned
These Strawberry meringue cookies are perfect! Thank you for sharing this recipe!
Caroline's Cooking
Thank you, glad to hear you enjoyed! They are always well-loved here.